- How to photograph the sea?
- How to catch the light?
- Strong contrasts
- The equipment
Photographing at the sea is very popular and for good reason, because where else do you think more about vacation and relaxation than at the sea? Now it is important to transport
exactly this mood in the picture and that is not always easy. Many things such the sound of the sea or the smells of the sea are no longer present when you looking at the photos
later and so the challenge is to stage your visual experiences in the picture.

So what is to be done? There are a whole lot of aspects to consider and that will help you design a picture of the sea in a targeted manner. An important point is the
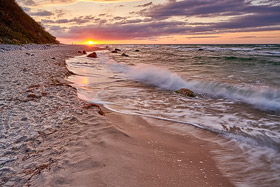
positioning of the horizon line. If we now start from the classical teaching, the horizon should be placed in the
"Golden Ratio".
Here, you mentally divide the picture into two horizontal and two vertical lines with equal distances. Then the main motif should be placed at the intersections or the virtual lines. So far for
the theory and at the core, there is nothing wrong with this basic rule of image design. However, in order to produce more tension in the image, I often deviate slightly from the rule of thirds.
I would still advise beginners to strongly orient themselves to this rule of image design. Especially with sea pictures, it is almost always disadvantageous if the horizon divides the picture
exactly in the middle or if only a very small, narrow strip remains for the sky in the picture. In case of doubt, you are well served with the "rule of thirds". Of course, the decision where the
horizon should be placed should not be made arbitrarily. So the first confrontation with the image begins, because now you have to decide whether the sky or the earth or the sea should have the
greater weight.
You will usually only allocate adequate space in the image for the sky if there is an interesting play of
clouds in the sky.
(back to the beginning)
The most important component in photography is light, and if you push it to the limit, you could even argue that in essence, in landscape photography, you are primarily photographing light.

If you attach such high importance to light, as I do, then you should familiarize yourself with the subject. The lighting conditions are always different and depend on the
seasons, time of day, and sunlight. Even if the sun is not visible, this is not a disaster for the landscape photographer or for photographing at sea. We just have to adjust our motives to the
lighting conditions. However, one should also accept that there are times of the day when you should not use the camera. In particular, when the sun seems to be doing its job best on a clear
day, the photographer is dependent on a very small window of time if he wants to use the best light. Only the light models our motives and creates beautiful structures and gives the pictures a
three-dimensionality that is not given in the harsh afternoon sun. I consider the best window of time for photography on clear days to be the period of an hour before sunrise until about half
an hour after sunrise, and about half an hour before sunset until about 1 hour after. Of course, this is only a rough time orientation that I always adjust on site to the conditions. The
season plays an important role here, as the light is much softer in the winter due to the tilt of our globe, so you can extend the time period. The location also plays an important role, as the
sunlight, for example, shows itself much less "harsh" in Scandinavia than in southern Europe, for example.

However, what if there is no sun at the sea? Here, I would distinguish two different situations. If storm clouds are forming in the sky, you should try to capture the
situation in the picture in any case, because these dramatic cloud formations at sea are particularly rewarding motives. If only boring, structureless sky is seen at sea, opportunities for
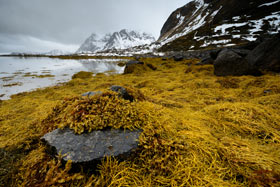
beachcombing such as shells, stones, or seaweed are often available. In such lighting conditions, it is also possible to take photographs all day long, as this light is then particularly optimal
for capturing beachcombing items.
(back to the beginning)
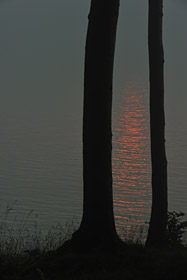
When it comes to photography by the sea, one often has to deal with strong contrasts. Even if one mainly uses the early or late hours of the day, one will often have to deal with backlight situations.
So how does one cope with this high contrast range?

Graduated neutral density filters offer a good solution for high contrast situations in sea photography. Generally, there are two types of filters, ones with a soft transition
between the colored or clear part of the filter and ones with a hard transition between the layers. I have chosen the Nisi system, but other systems like Lee, Cokin, Hitech, or Singh-Ray work similarly well.
For sea photography, I often use graduated neutral density filters with a hard transition as many photos have a clear horizon line between the sea and sky where the contrasts are the greatest. A set of
hard and soft graduated neutral density filters with three different filter strengths has proven to be effective for me. The Nisi graduated neutral density filters I use are labeled 0.3 ND, 0.6 ND, and
0.9 ND, expressing the level of effectiveness and reducing the exposure by one to three f-stops. The filters can also be combined with the appropriate filter holder to achieve different levels of
effectiveness.
Another solution for dealing with high contrasts is HDRI (High Dynamic Range Image). In HDR photography, multiple exposures are taken and then combined on the computer. Personally, I prefer to use
filters during the shoot, as I prefer to spend more time on location outdoors than having to use time later on the computer.
One problem with HDR is the movement of the subject during the exposure. At the sea, there is always movement due to wind and water, and it is difficult to control the result of the HDR shot if
you are not creating an HDR from just one photo. Modern HDR software can reasonably well eliminate these so-called ghost images, but in my opinion, it does not work perfectly. The blurriness of
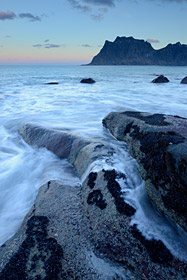
moving water, however, can be well integrated into the image design. If you want to have motion blur in the image, I recommend a series of different exposure times, as you can later assess the
results better on a computer than on a relatively small camera display.
(back to the beginning)
I recommend using a stable tripod for almost all shots, and it's not surprising that I would like to avoid doing without this tool when taking pictures at the sea. The lighting conditions
usually make longer exposure times essential, as mentioned, the best results are achieved at sunrise or sunset. Wide-angle and medium telephoto lenses are the best choice for the focal length,
but a macro lens should also be there. To handle the contrasts, gradient filters are needed, and if you want to experiment with the motion blur of the water, one or two neutral density filters
with different intensities are recommended. Personally, I use a neutral density filter ND 1.8 (-6 stops) and a neutral density filter ND 3.0 (-10 stops) for these purposes.
(back to the beginning)
written: April 2013, (author: Olaf Juergens)
 print version


