How to photograph birds
- The procedure
- Camouflage and deceive
- The blue diamond
- How to photograph birds in flight?
- Artwork
- Experiments
- Keep small birds small
- Winter feeding
- The equipment
The procedure
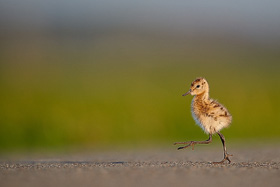
Without preparation, the success will be limited in the long run and this will inevitably lead to frustration or, in the worst case, to giving up this area
of nature photography. So what needs to be done? The most important task before taking the first shot with the camera is to obtain as much information as possible! If you have set
your sights on a specific bird species, sources such as the Internet or a biology book can be very helpful in obtaining information about a specific bird. It is
important to know where and when you can encounter the bird species, when the birds are defining their territory, when the mating season is, and when the time for breeding and
raising young is. Our models, in particular, like to show themselves to the photographer during the period when the birds are defining their territory and during the mating season.
Once the birds are in the breeding season, one parent always sits on the nest and thus 50% of our subjects disappear from our view.
If you don't have a specific "model" in mind and want to capture everything that comes into view, you can obviously save yourself the detailed knowledge. However, just theoretical knowledge alone also only helps to a limited extent, as the next step is to find the appropriate places and that is by far the most difficult and time-consuming task in bird photography!
(back to the beginning)
Camouflage and deceive
Once you have found a promising territory and observed that the birds frequent these locations, the next step is to determine the best approach.
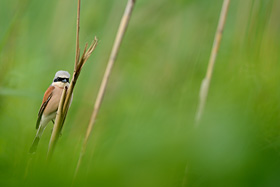
The choice of approach depends on many factors. Firstly, it must be determined how accessible the area is. Is the area accessible by car, is there good cover,
can I set up a hide, and am I allowed to enter the area without permission? After these questions have been answered, it is also important to determine how shy the birds are. There
are extreme differences in flight distance, which depend on the bird species and whether the birds are used to people. It is a huge difference whether you want to photograph birds
in a city park or in a nature reserve. While taking pictures of birds with smaller telephoto lenses and without camouflage is usually not much of a challenge in a park, it
is extremely difficult if you want to photograph a crow or heron in a nature reserve from your car. Some bird species such as crows, herons, or birds of prey react to the slightest
movement and noises in their environment. Especially in Germany where hunting pressure on animals is quite high, it is often necessary to deal with large flight distances. Even birds
that are no longer allowed to be hunted, such as birds of prey, seem to perceive humans as a threat based on their instincts. This even extends to changing the environment, such as
setting up a hide, which can pose a threat to the animals under certain circumstances. In the case of the hide, one can only try to accustom the birds to the changed environment over
the long term by setting up the tent a few days before in that location.
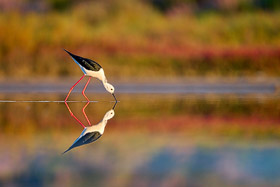
Thankfully, it's not always so difficult to get successful bird photos. Many songbirds can be easily photographed from the car, as long as the conditions are right.
The car provides adequate camouflage for many birds. When photographing from the car, there are generally two approaches. One possibility is to slowly approach the bird at a walking pace,
while the second option is to find a perch and then place the car accordingly, and then to speculate that the bird will fly back to the same perch. Personally, I prefer the second option
in most cases. You do have to calculate more time, but this method is easier on the nerves of both the bird and the photographer. When slowly approaching the birds often fly away and you
simply do not reach the desired proximity.
A good opportunity for bird photography and in part without camouflage are the hotspots. Hotspots are places where many nature photographers usually meet and the birds lost their awe. The side effect of this gathering of nature photographers is a short flight distance of the animals, and thus at some places the need to camouflage isn't necessary. Well-known hotspots can be found on Helgoland, Texel or at the lake Günzer in Mecklenburg-Vorpommern.
(back to the beginning)
The blue diamond
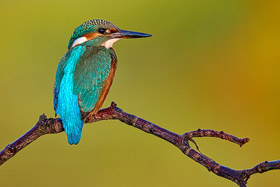
When starting nature photography, a lot of photographers have the goal of taking a photo of a kingfisher. So I have decided to write a few lines about it. At the
beginning of my own nature photography it was also my goal to capture this "blue diamond" in high quality. At first, I thought it was an unattainable or at least highly difficult task.
However, after having photographed several kingfishers in recent years, I have come to the conclusion that taking a photo of a kingfisher is not such a big challenge. Of course, how
easy something is is always relative, but there are certainly a very large number of bird species that are much more difficult to photograph.
OK, what to do now? When it comes to photographing a kingfisher, the main task is preparation. The main challenge is to find a kingfisher in the first place and that's more than "half the battle." Kingfishers love clear waters with a fish population. This could be a stream or a still body of water. When it comes to a stream, make sure the flow is not too fast. Ideally, the stream has a small dip or takes a curve, making it easier for the kingfisher to hunt a small fish. So the first step is to use binoculars to find a location with a kingfisher. During the search, also include your ears, as the kingfisher has a typical high, piercing call that can be easily recognized. Once you have discovered a kingfisher, the rest is relatively easy. A kingfisher is very faithful to its territory and is a sit hunter. So if you know the branch the kingfisher is on to look into the water to search for prey, all you need is camouflage and patience ;-)
(back to the beginning)
How to photograph birds in flight?

If you are inexperienced in bird photography in flight, you should first look for a place that allows for regular flight shots. This can be a park with a water
body where herons or swans frequently land. This also saves you the camouflage that makes conditions more difficult for flight shots. Depending on the focal length you want to
use, but at the latest with more than 300mm, I recommend a tripod with a tilt head or pan head. Ball heads are usually less suitable because the head can tilt to the side when making
fast movements and it is difficult to keep a ball head steady. A tripod has the additional advantage that you can relieve your arms when there is no bird in the air, and yet you can
quickly get the camera ready again when something happens in the air.
Ultimately, creating successful flight photos is always a matter of practice. It's helpful to observe the flight space at all times, as the earlier you discover a flying subject, the more time you have to align your lens with the bird. Additionally, it's always an advantage for the autofocus if the target can be tracked for as long as possible.
(back to the beginning)
Artwork
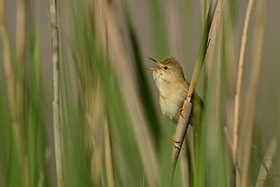
When I started bird photography many years ago, I was happy with every technically successful bird photo I took. When I caught a bird that was rarely seen, I was
especially happy. Even then, I paid attention to nice light and a possible "golden ratio"
in the composition of the picture, but over time I realized that this alone does not make a first-class bird photo! For me, a first-class photo tells a story.
A photo with a bird completely separated from the background has little to no additional meaning, as if the background reveals little or nothing about the environment, the photo can only be declared
as a good documentation. Although I still take these types of photos from time to time, capturing the bird as closely as possible, these have become rare and I rarely find them truly appealing after
reviewing my photos. So, if you want to give your bird photos more than just biological meaning and add emotions to them, it's definitely worth trying to incorporate more background into the photo.
It's much more interesting for the viewer to learn about the bird's habitat besides just the bird itself. However, there should be a basic rule that should always be desired, with very few exceptions
(flight photos or special perspectives), that is, to photograph the bird at eye level. Therefore, I only photograph birds that are on the ground in a lying position and often only with a bean bag as
a support for the lens.
(back to the beginning)
(back to the beginning)
Experiments
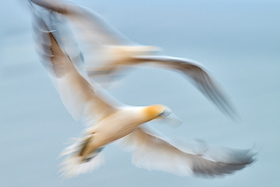
Especially bird flight shots invite you to approach bird photography in an experimental way. If you choose a longer exposure time, motion blur effects can be created, which
can add a great deal of dynamism to an image. The most suitable exposure time depends on how fast the birds are moving and whether you prefer a subtle motion blur effect or a more abstract one.
If the result shouldn't be too abstract, exposure times of around 1/15s are typically used. It's important to experiment and take more photos rather than too few
(back to the beginning)
(back to the beginning)
Keep small birds small
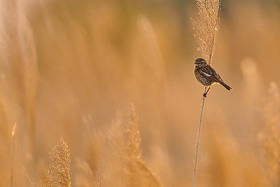
In the last section of image composition, I mentioned that a bird does not always have to be depicted in the most filling format. Here I would like to show
a few examples that take this type of image composition to the extreme. If the bird is depicted very small, it is therefore even more important to choose an interesting background
in nice light. In the end, it is always a combination of an interesting background that gives an insight into the bird's environment but at the same time remains unbusy and harmonious.
(back to the beginning)
(back to the beginning)
Winter feeding

Winter feeding provides a good opportunity to come up with nice bird photos with a manageable time investment. In winter, birds can be easily fed especially when
the surrounding is covered with snow. In summer, most birds prefer insects, but with limited availability of insects in winter, they switch to seed food. Setting up a winter feeding station
is relatively simple, but there are some things to consider to get good results. The location of the winter feeding station should not be the garden as it limits the choice of bird species
that come to the feeding area. A place near the edge of the forest is better suited. The forest is not usually a good location as the light conditions are often not optimal. Of course, one
should ask the owner of the property for permission to set up the winter feeding station.

The other things to make the winter feeding a success are quite simple. Birdseed should be placed at the feeding site over several days and regularly, making sure
it doesn't get wet. Setting up the hide or building a hide should be done with consideration for the sun's position so that you don't have to photograph in backlight. At the feeding site,
you can get creative by placing branches in a way that the birdseed isn't visible in the final photograph. In addition to the traditional birdseed, I also recommend placing a few hazelnuts
or peanuts, as they can also attract larger birds such as a jay.
Winter feeding can be quite exciting and successful. However, I myself have not been running a winter feeding for a few years now, as it is even more fun for me to go on a discovery tour during this time and I do not want to spend this time in the hide. Furthermore, from the point of view of nature conservation, I consider winter feeding to be harmless and share the assessment of the nature conservation union NABU.
(back to the beginning)
The equipment

There is probably no other area in nature photography that encounters a similar large amount of equipment as in bird photography. This usually means the need for as
much focal length and light intensity as possible, and unfortunately, that also means it can quickly become expensive. Especially in Germany, where birds usually have large escape distances,
500-600 mm in bird photography is not uncommon. Of course, there are exceptions where the animals are accustomed to humans or you want to include a lot of environment in the picture, but
even here, small focal lengths quickly reach their limits. If you can't or don't want to spend so much money on a lens, and are just starting out in bird photography, it is advisable to
start with a 300-400 mm focal length. Many people find after a while that they don't have the patience for bird photography, and in that case, it makes sense not to spend too much money at
the beginning. With a 300mm (initial aperture 4) + teleconverter and a crop camera, you already have quite acceptable options. Besides a tripod, a beanbag is useful if you want to take
pictures from the car. The desire for a hide will not be long in coming if you want to pursue bird photography more intensively. I also often use only a camouflage Throw Over Hide (bag hid),
as I am much more flexible and less noticeable than with a large camouflage tent.
(back to the beginning)
(back to the beginning)
written: October 2013, (author: Olaf Juergens)
updated: Juli 2022

