Nature photography in the forest
- The chaos in the forest
- The image composition
- Sun stars in the forest
- Mushrooms in the forest
- The weather and the seasons
- The equipment
The chaos in the forest
Photographing in the forest is certainly one of the most challenging tasks in nature photography, but why is that? One of the difficulty is the lighting conditions found in the forest. The light in the forest is usually so low that the shots need to be exposed for a long time, but there is an easy solution for this problem, which is the use of a tripod. Another problem is the very high contrast that challenging every sensor. I do not have an easy solution for contrast management at this time, so my advice in this case is that highlights may "bleed out" or depths "sink," but it depends on the fact that the image areas are properly exposed with the main statement of the subject. There are still some ways to keep the contrast in the forest low, but more on that later.
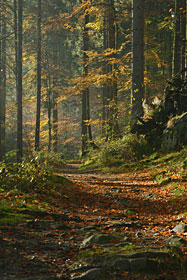
OK, what to do now? First of all, you should always keep in mind the things mentioned above when taking the shots! You will only be able to control the chaos in the viewfinder if you put a lot of effort into the composition and that means you should meticulously design the subject in every detail. The more time you take, the closer you get to your goal. If you are expecting a patent solution from me, I'm sorry to disappoint you, as forest photography has many facets. For example, the subject can be a whole forest, a single tree, or even small details and the composition is of course greatly dependent on this. Nevertheless, I would like to try to show some possible ways of better composition in the next section. (back to the beginning)
The image composition
With a good image composition, the chaos in the viewfinder can be reduced. Our task is therefore to bring order to the image.

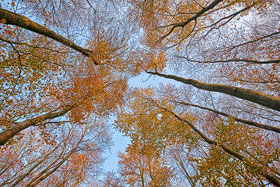
In order to create this structure in the image, one should be aware of the foreground and background during image composition. Good tools are also lines that lead to the main subject, as this creates spatiality in two-dimensionality. Such lines can be, for example, forest paths, streams or tree rows. It is also worth trying a different perspective, for example, photographing from a frog's perspective into the tree tops.
(back to the beginning)
Sun stars in the forest
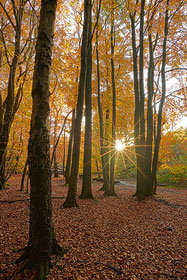
Taking photographs in the forest with backlight is particularly popular for creating sun stars or, more specifically, aperture stars. An aperture star is created by the light bending at the corners of the aperture. The appearance of the aperture star in the photo is largely dependent on the lens used. I personally like to use a 20mm prime lens with 7 aperture blades, which produces 14 aperture rays. However, nice aperture stars can now be produced with zoom lenses as well. I recommend trying a comparison test with available lenses, as not only the number of blades but also the shape of the blades (angular, rounded, or fully rounded) affects the result. If the latter is the case, then there are no blade edges and, unfortunately, no aperture star.
Once the right lens is found, it's important to close the aperture because with an open aperture, a sun star cannot be created. I usually use apertures between f/11 and f/16, but personal taste and experimentation also play a role. The more the aperture is closed, the longer the sun rays will be. However, with apertures smaller than f/16 (larger f-number), you will already have significant diffraction blur and the image quality will suffer noticeably.
(back to the beginning)
Mushrooms in the forest
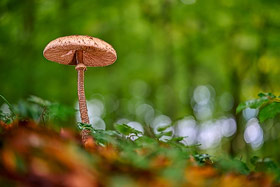
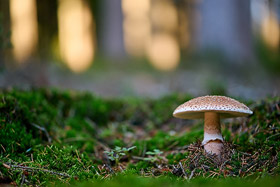
A problem that often occurs in mushroom photography is the lack of light under the cap of the mushroom. To get some light to the bottom of the cap, I use a small reflector and redirect the natural light to the bottom of the mushroom. I never use a flash in photography, but a small flashlight that additionally illuminates the reflector is also very helpful or I use a small diffuser to shade the mushrooms if the sunlight is too strong on the mushroom.
(back to the beginning)
The weather and the seasons
Regarding the different seasons, there is really not much to say except that taking photographs in the forest is worthwhile in all seasons. However, I like autumn the most among all seasons because nowhere else is the colorfulness as great as at that time. However, the best period in autumn is usually limited to 1-2 weeks, because the colorful leaves fall quickly once the autumn storms sweep across the country.
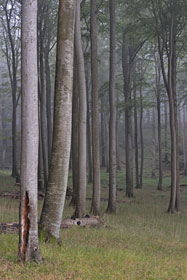
Photographing in the forest is also worth it in sunny weather, as beautiful moods can be created in backlight. I would only use the early morning or evening hours in the forest because otherwise the sun is too high and the light is too strong. A particularly interesting weather condition in the forest is the fog , , which gives the picture a mystical feel. The fog also helps us separate the background even more and better structure the image.
(back to the beginning)
The equipment
The most important tool for photography in the forest is a solid tripod, as the lighting conditions make longer exposure times necessary if one does not want to work with very high ISO values.
As far as focal lengths are concerned, I would pack lenses from wide angle to medium telephoto in my camera bag, but of course a macro lens should not be missing either. I also consider it
especially important to take a polarizing filter with you, so that you can reduce reflections or enhance colors with the filter in the forest.
(back to the beginning)
written: Dezember 2013, (author: Olaf Juergens)
updated: November 2020

